# Schedules
# Production Schedule
As Studio Manager, you can set the global Schedule as a reference for your production.
The main purpose of this Schedule is to track the milestones linked to your contract.
It's your Reference schedule.
To display the Schedule properly, you need to create assets and shots and define your production's Task Types.
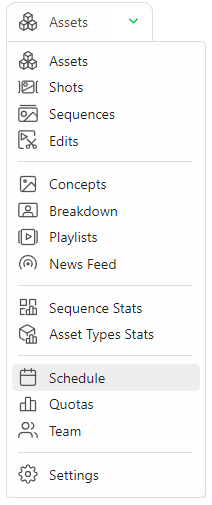
On the drop-down menu, choose SCHEDULE
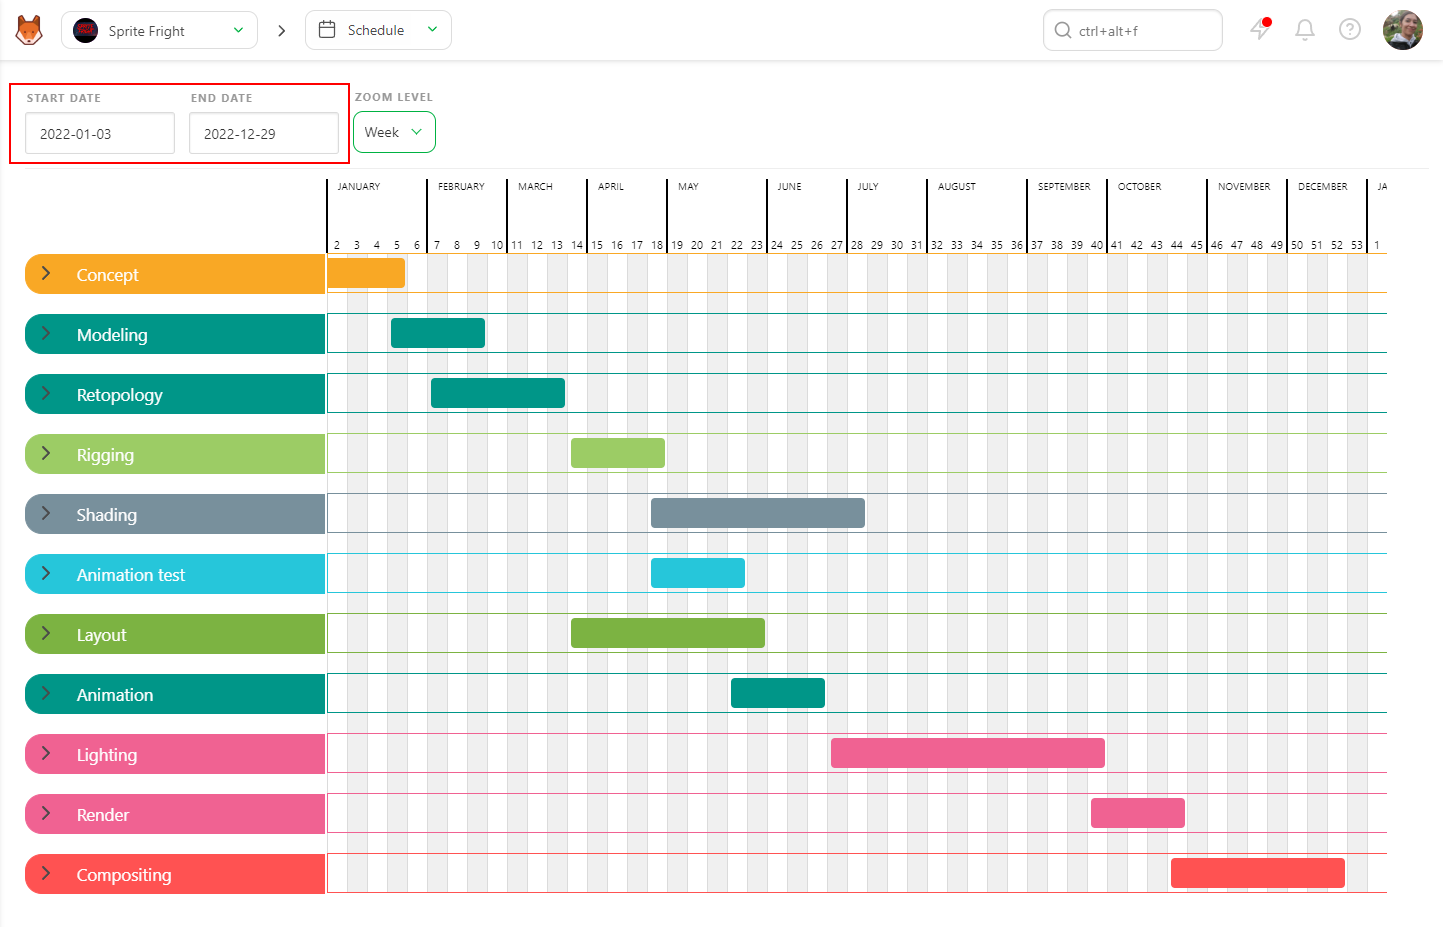
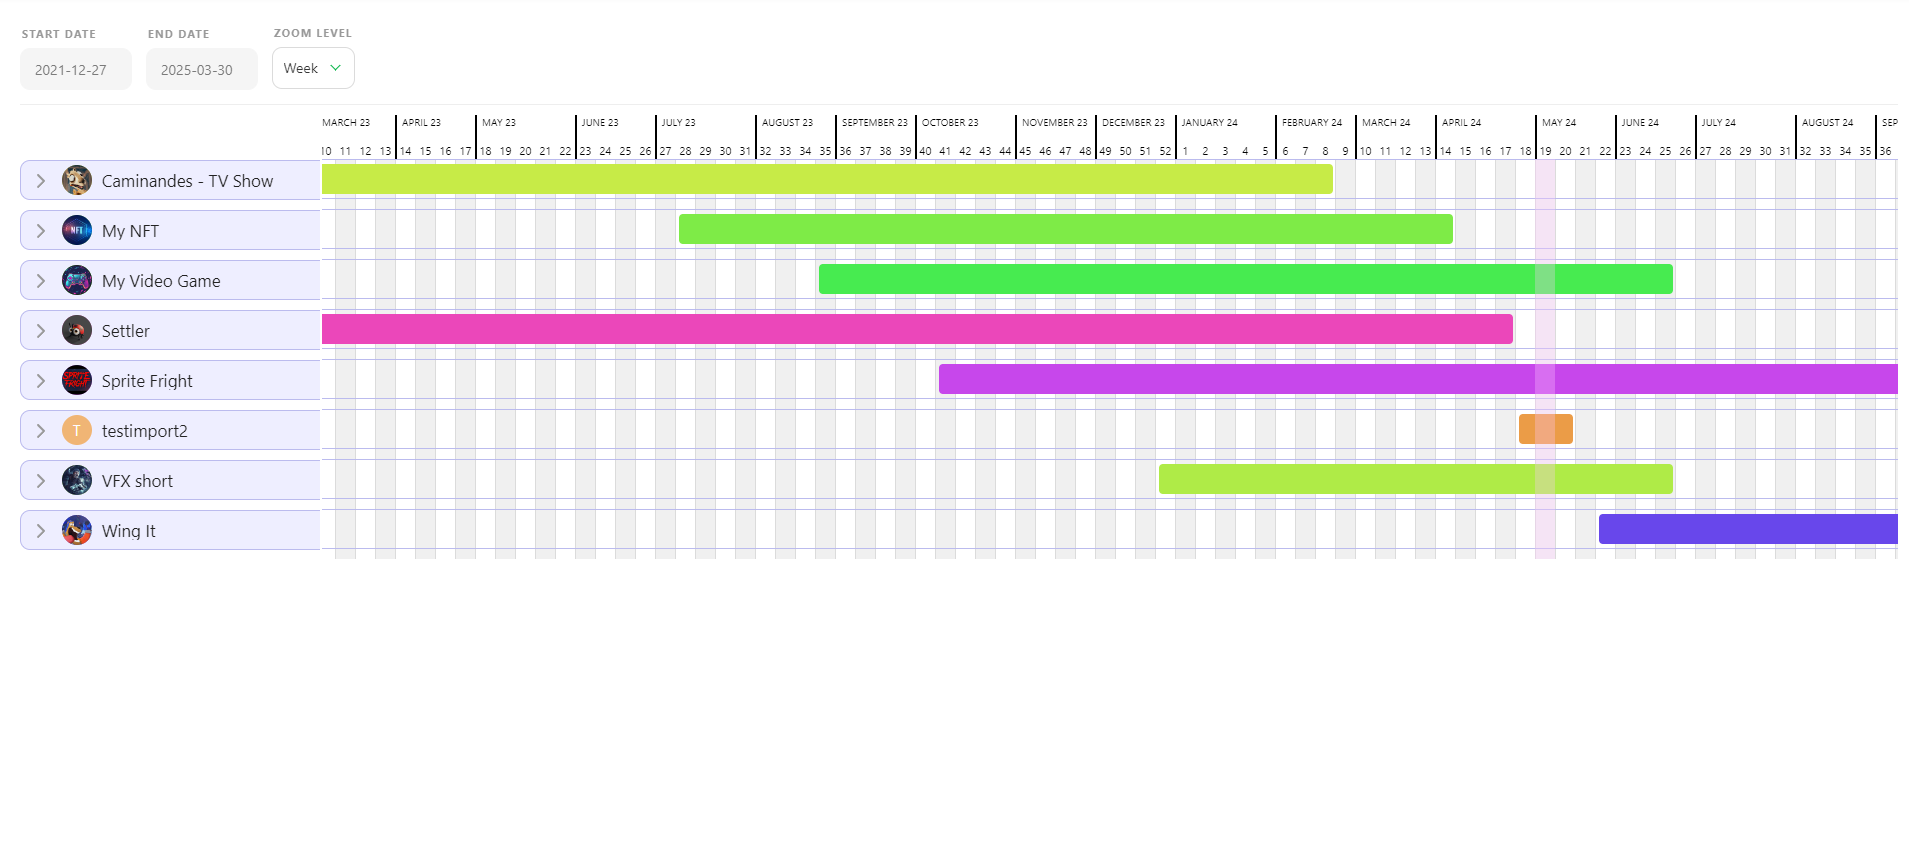
On top of the Schedule, you can see the start date (1) and the end date (2) you have defined when creating the production.
Click on the box to open the calendar and pick a date.
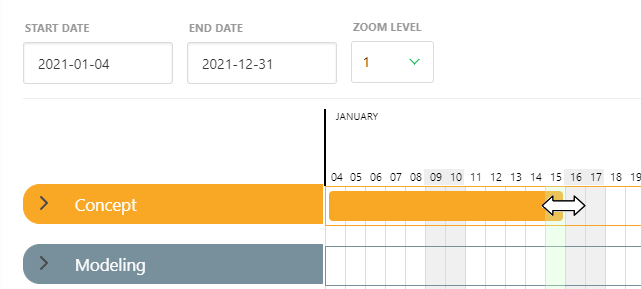
You can define each task type's start and end date on the Gantt Schedule. The task types are the ones you have already added to your production.
You can do it in two ways: the first one is by moving the bar directly, and the second is by entering the date on the settings page under the task type section.
Put your cursor on the start date; the cursor changes as a double arrow. Then, drag and slide the start date. Do the same for the end date.
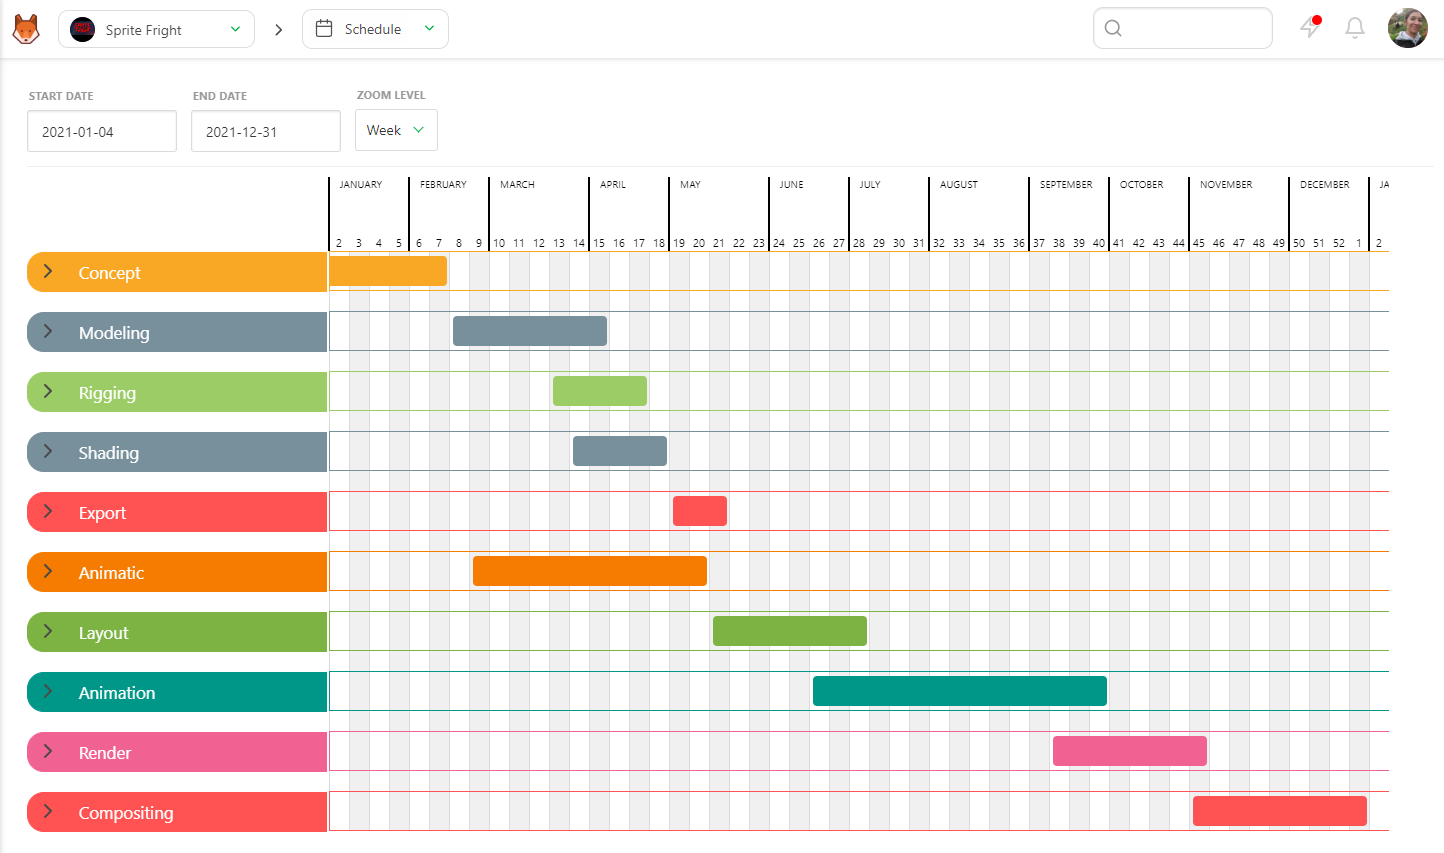
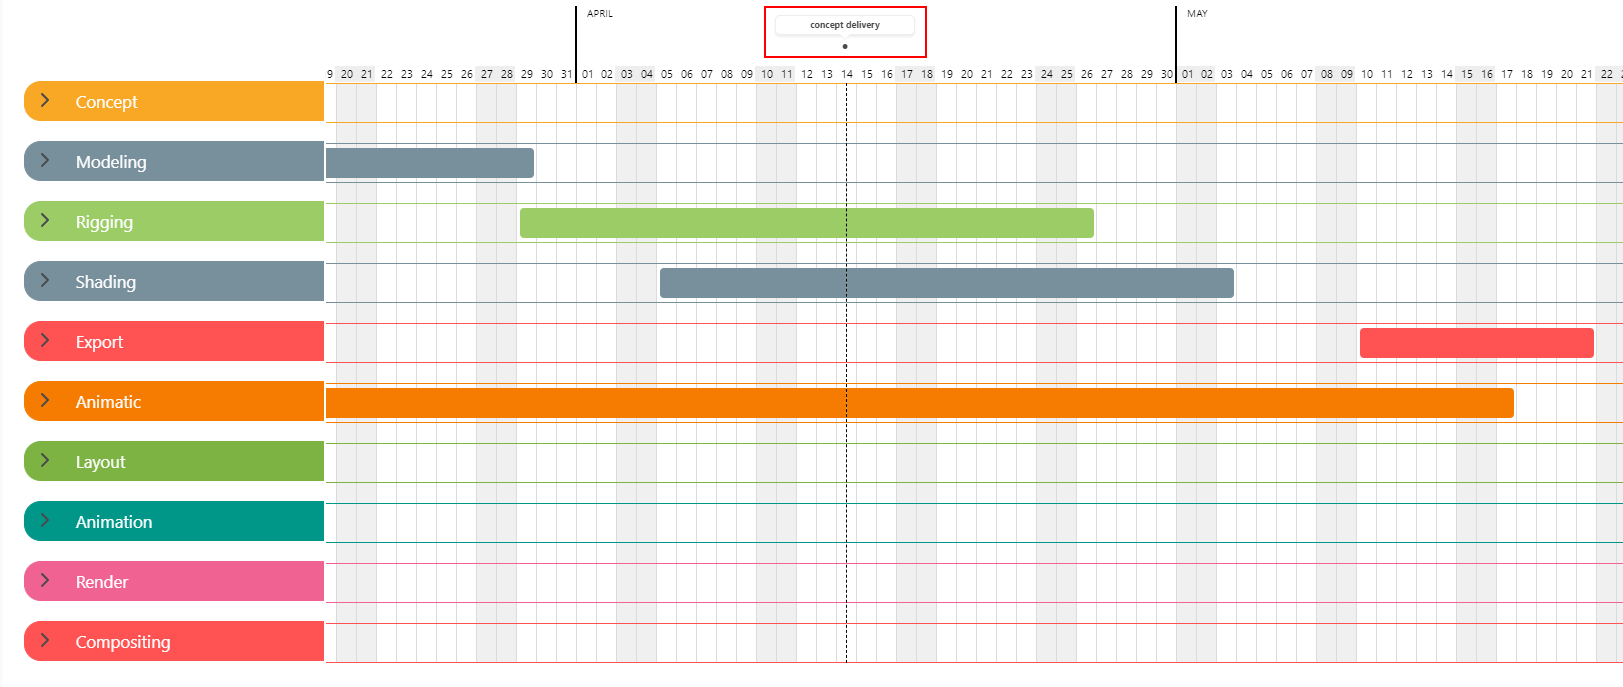
Once you have defined all the start and end dates of the task types, your Schedule should look like the example.
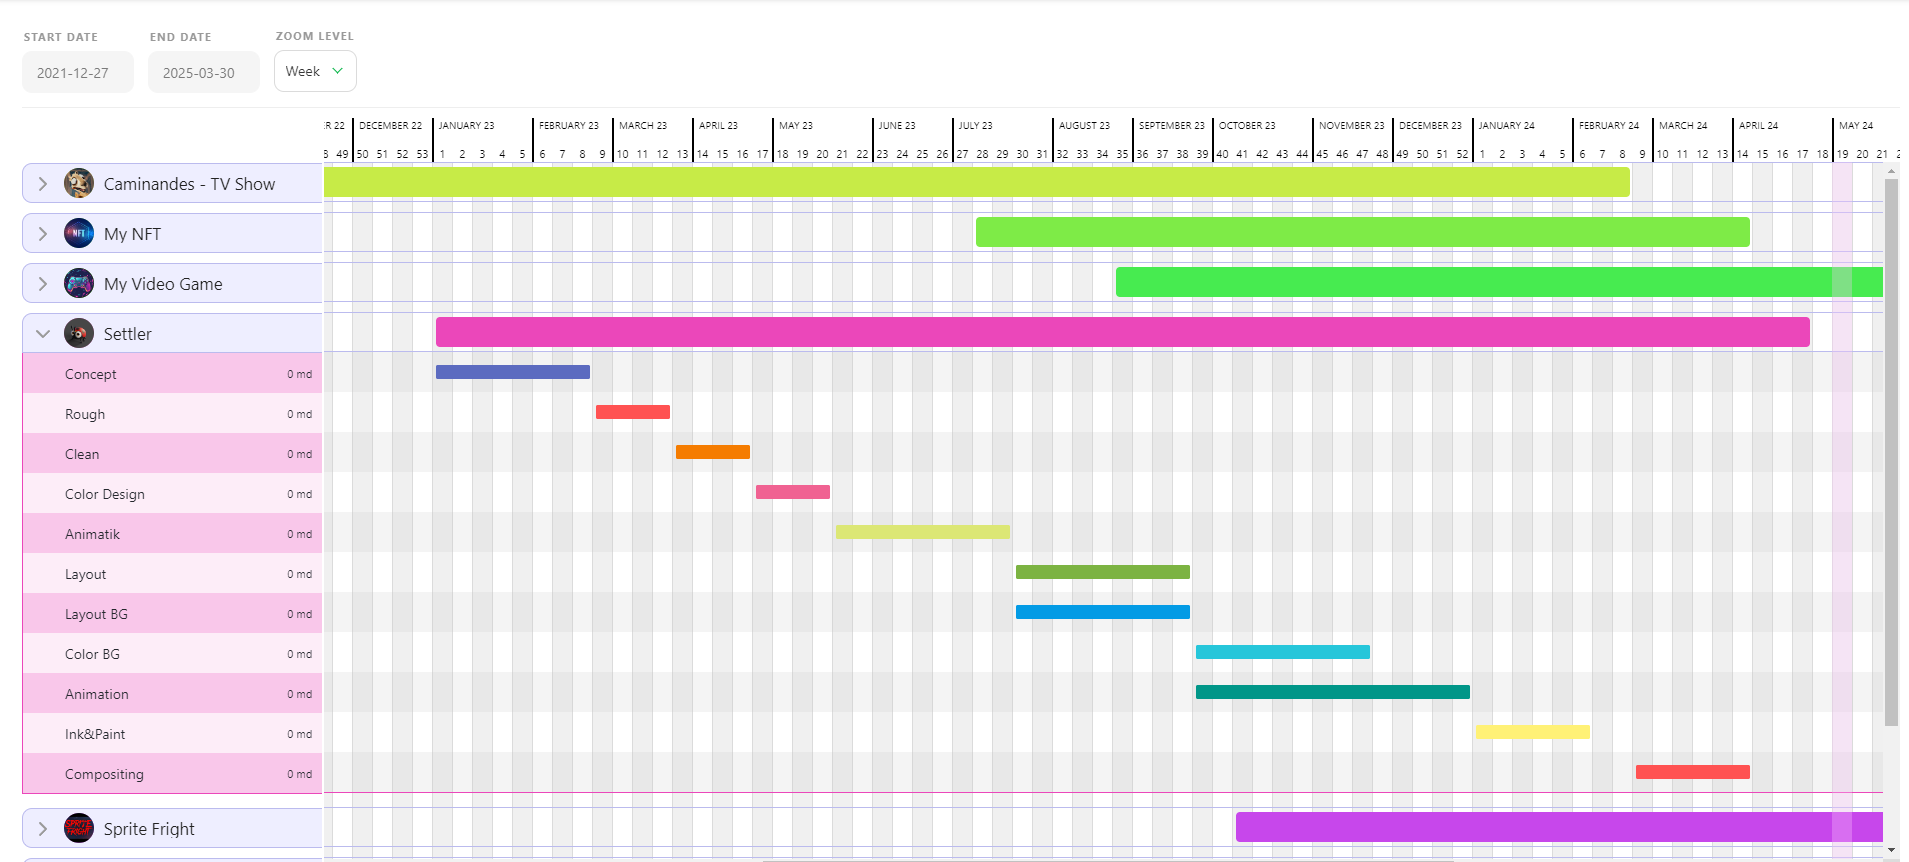
Once it's done, you can unfold each task type and access a level of detail: asset type for the assets, sequences for the shots.
You can select all the Gantt Diagramm bars and move them all simultaneously, with CRTL + Left Click.

You can set the start and end dates the same way you would for the task type. You can also define the work period for all the asset types.

You can do the same for the shot task types and determine the start and end dates for the sequences.

You can add a milestone by hovering a date. A  appears,

When you click, a pop-up window asks you to add a name to the milestone.

You can see a small black dot and a vertical line to display the milestone. If you hoover the little black dot, the milestone's name appears.
You can change the milestone's name by clicking on the  or anywhere on the milestone name.
From there on, you can rename or delete the milestone.

Everybody can access this page, but only the Studio Manager can modify it.
To view the tasks in more detail and keep track of them, click on the task type's name.
It will lead you to the Schedule tab of the task type page.
# Task Type Schedule
You can go to the Task Type page if you need more details than the production schedule.
You can notice tabs on the page: Tasks, Schedule, and Estimation. Click on the Tasks or Schedule tab.

There are two ways to set the artist's Schedule.
The first way is with the Tasks tab, where the estimation time and the **Start date are set. The Due date is filled automatically. If you navigate the Schedule tab, you will see that the Gantt diagram is filled out automatically.
You are only allowed on the Schedule Tab to slide the bar and change the Start date (or Due date). The length of the task is set by the MD.
Once the estimation is set from the Tasks tab, you can change it by editing the MD column on the Schedule tab.
The second way is to set the length directly (Estimation), Start date, and the Due Date from the Gantt diagram.
Put your cursor on the start date, and the cursor changes as a double arrow. Then, drag and slide the start date. Define your Due date by filling in the MD.
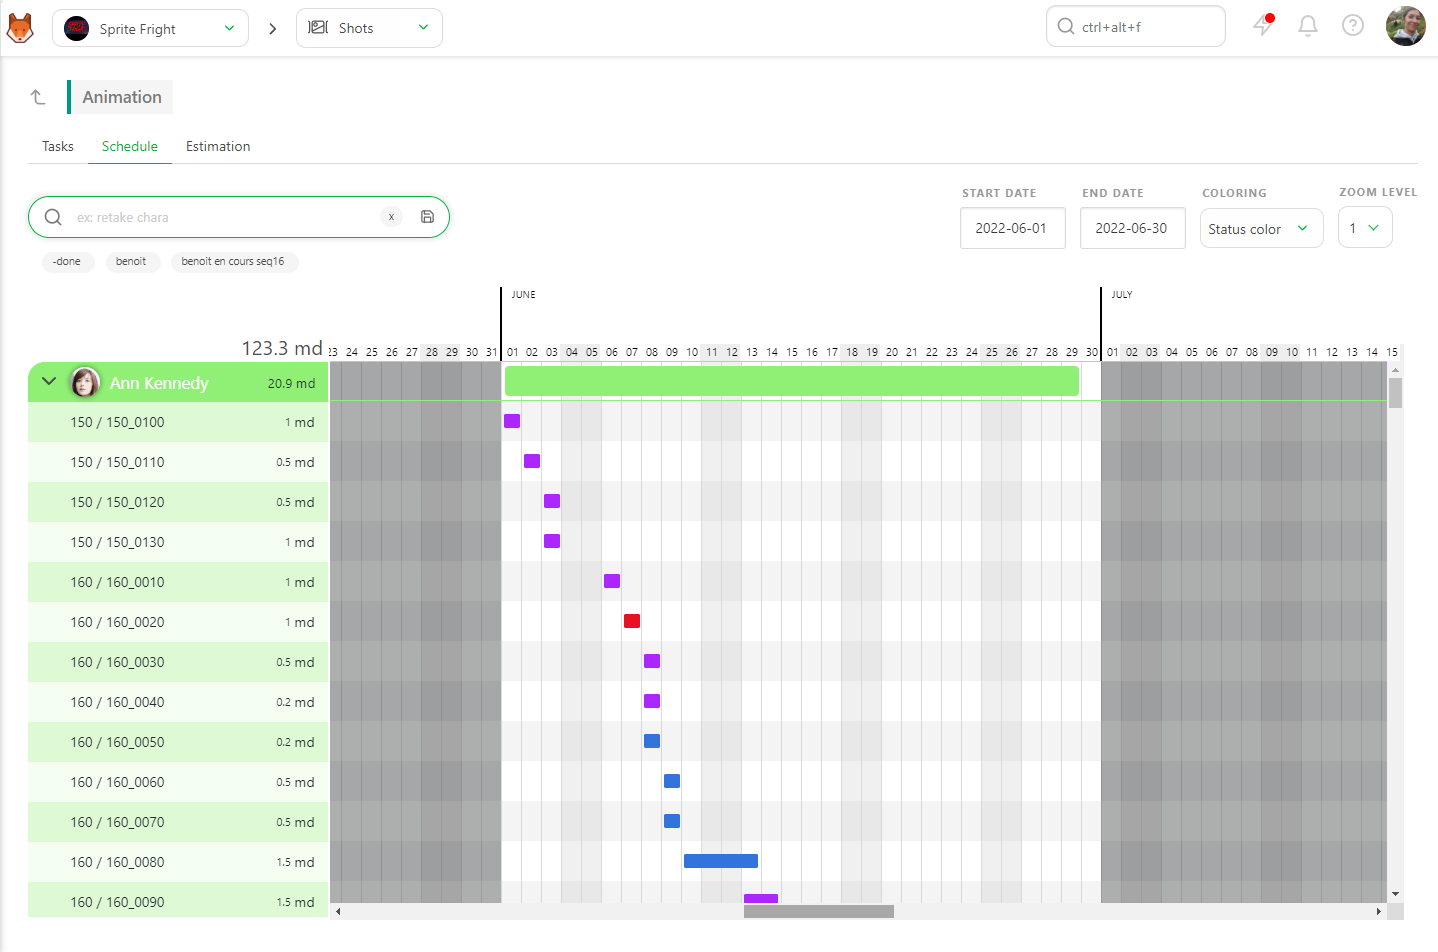
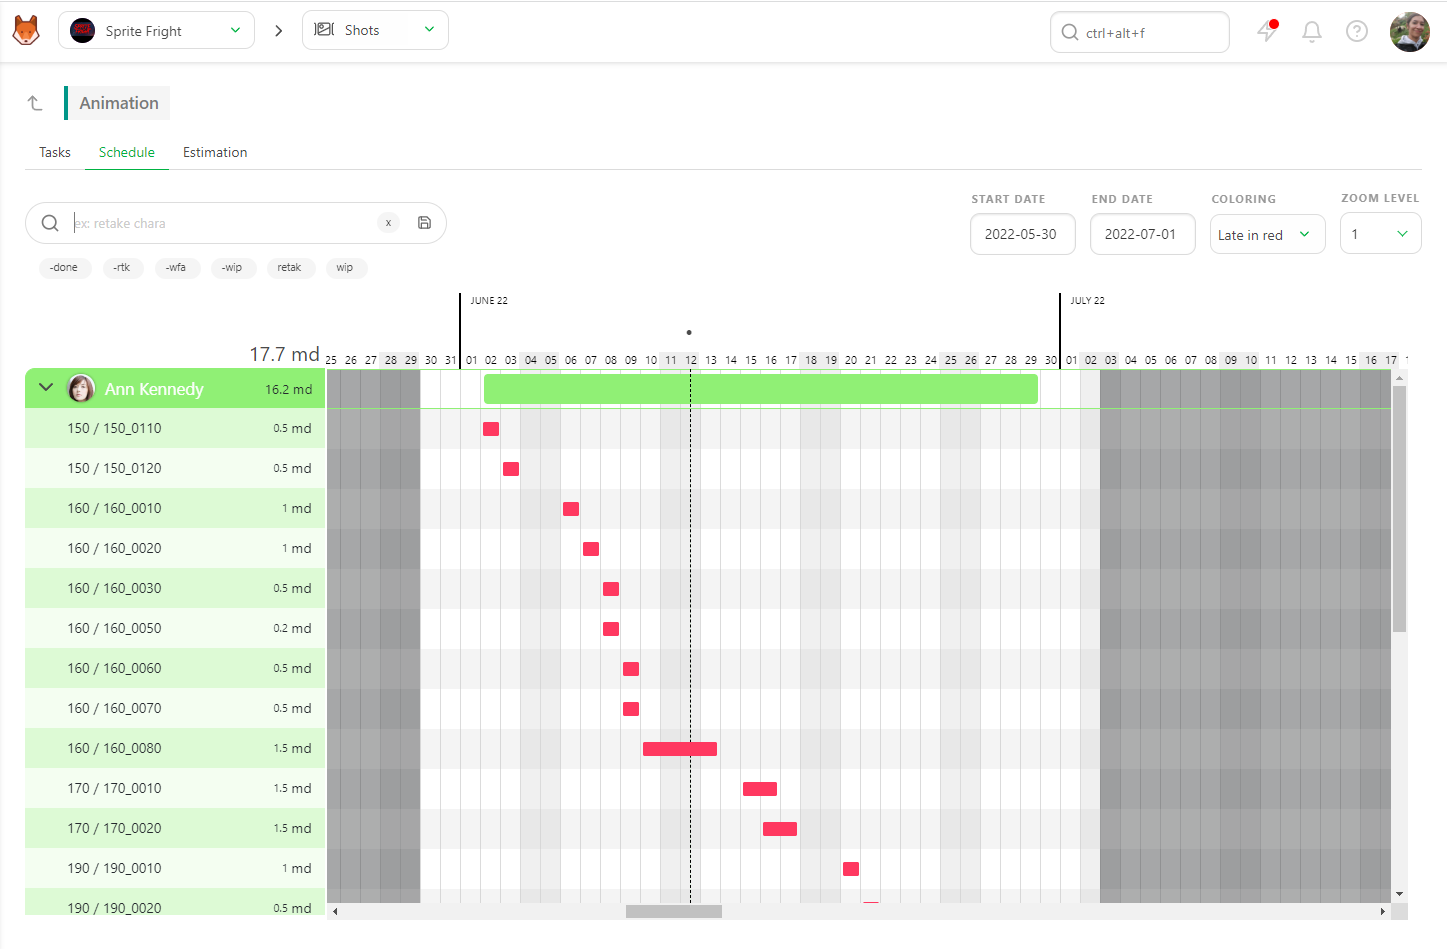
You can use the search bar (1) as on the other pages: you can search status (no need to add the name of the task type as you already are on a specific task type page), per asset type (or sequence), per asset name (or shot name), and per Artist name.
You can also reduce or expand each Artist (2) section to ease the Schedule reading.
You can change the bar's color in the Gantt diagram (3). By default, the coloring is set to Status Color.

Status color changes the bar's color based on its status. For example, Blue is for WIP, red is for RETAKE, purple for Waiting For Approval, and green for Done.
You can see the state of your elements and team in a glimpse.
Late in red displays the tasks that have not been validated yet but are behind Schedule; the Due Date has passed.
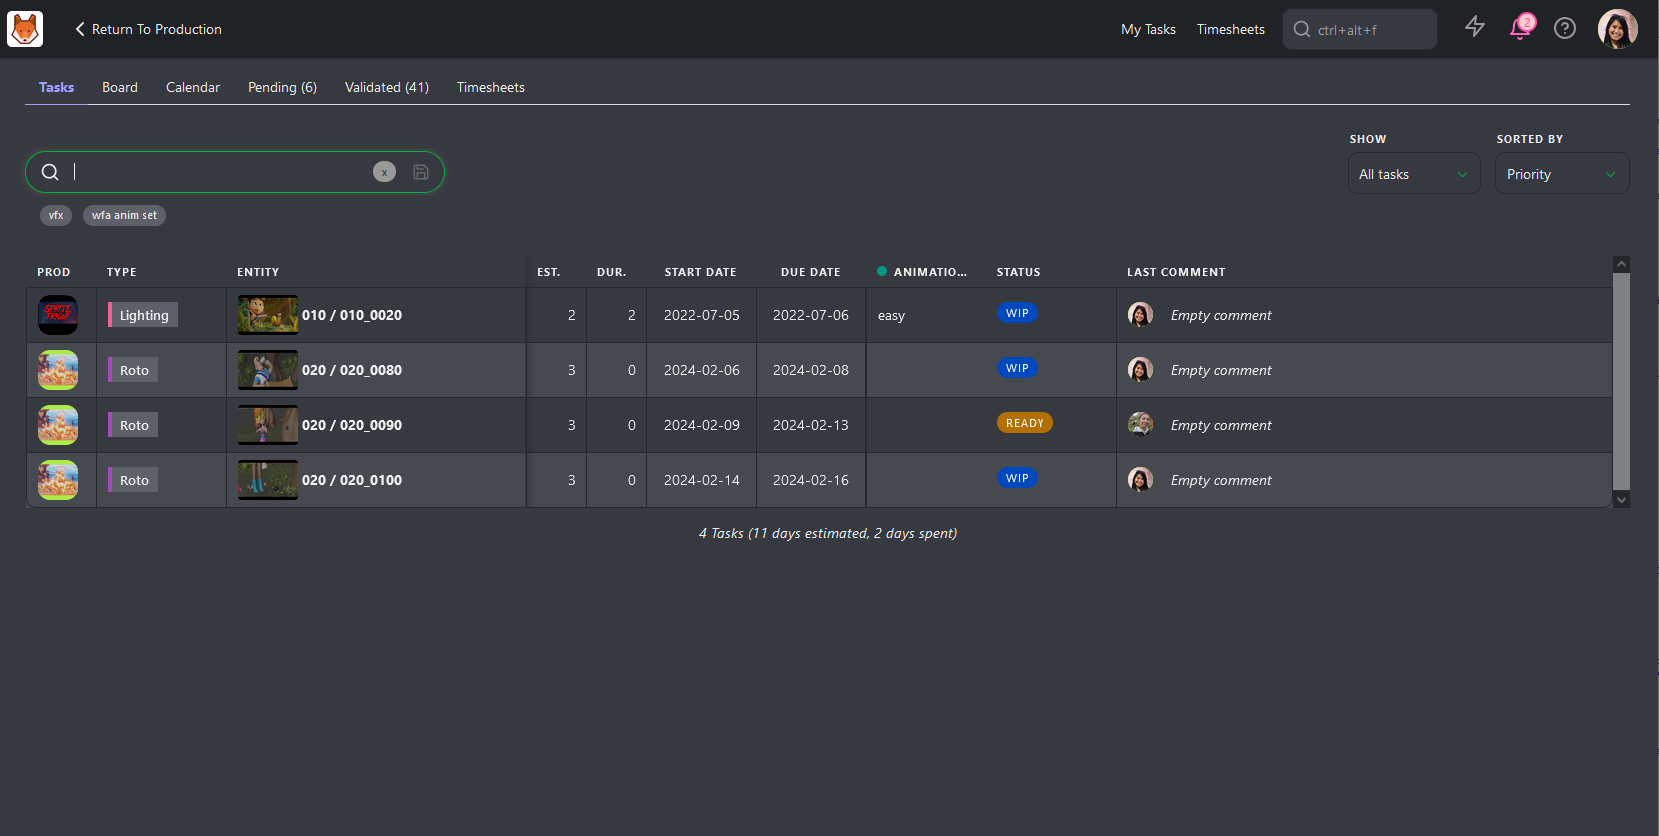
The Gantt diagram has an impact on Kitsu's other pages.
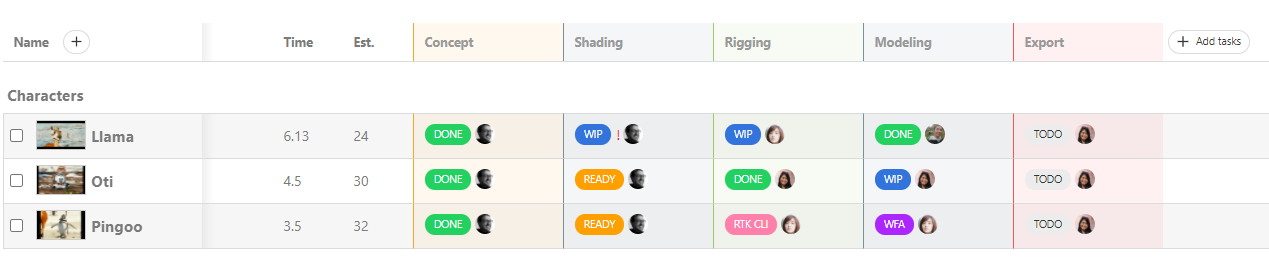
The Start date and the Due date are displayed on the Tasks tab of the task type page.

But you can also see the Due date and Estimation days on the Todo Page of an Artist.
Everybody can access this page, but only the Studio Manager can modify it.
# Asset and Shot Schedule
On the detail page of an asset or a shot, you can access the Schedule tab.
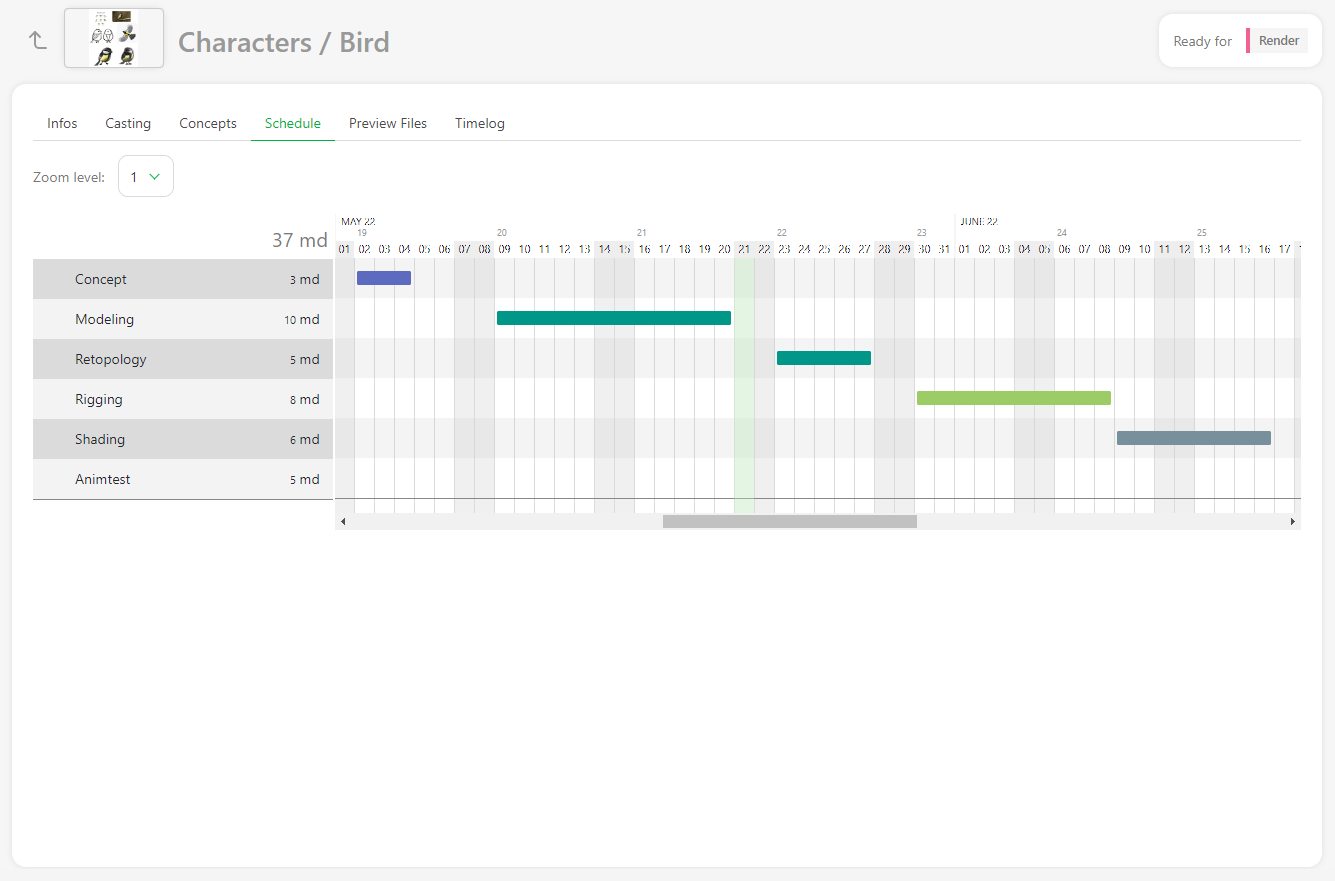
If you have entered a start and due date on the Task Type schedule, the Gantt bar will be displayed.
From this page, you can modify the length, start, and end dates of each task in the asset or shot.
# Studio Schedule
As a production manager, you have access to the Studio Schedule. The production schedules are in one place and help you prepare your productions better.
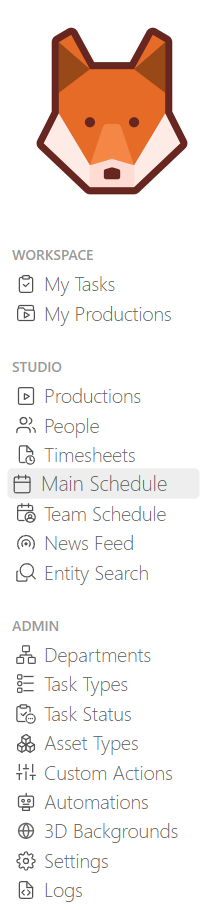
Go to the main menu (  ) and click on Main Schedule under the Studio section.
You see all your production in one line (start and end date). You can also have the main days you plan to use during this timeframe. You can also see the milestones you defined for each production.
You can unfold each production to see the details of each task type. The color is the same as the column on the global pages.
An important thing to keep in mind: you can't modify your production schedule from this page. You have to go back to the production schedule page you want to adjust to doing it.
Only the Studio Manager has access to this page.
# Team Schedule
As a studio manager, you must constantly be aware of what is happening with the team.
You need a global view of each department; the best way is to go to the Team Schedule.
Go to the main menu ( ) and click on Team Schedule under the Studio section.

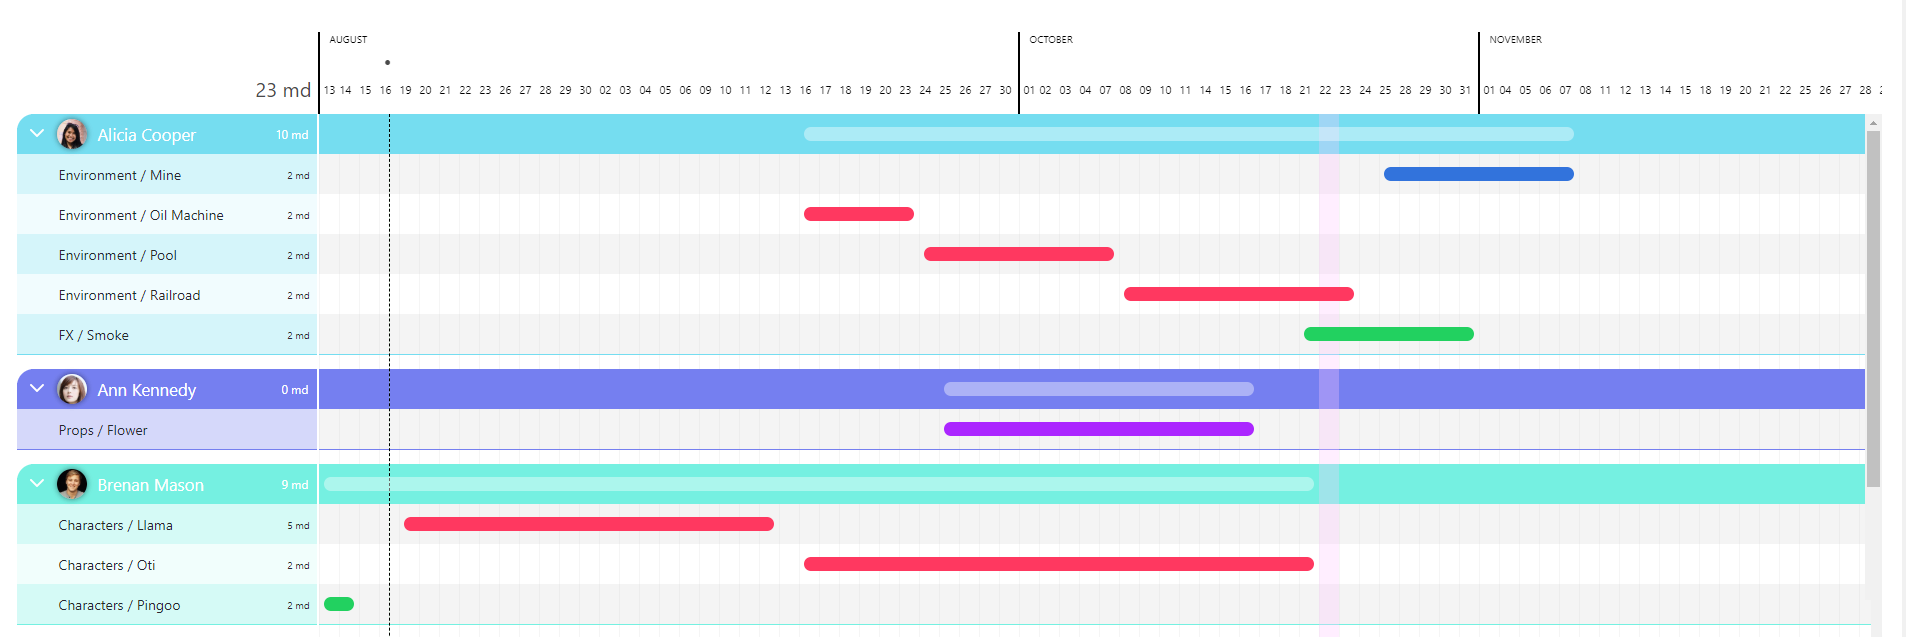
You will see all the people in the studio, one line each.
On the top of the page, you can select the timeframe you want to display as Start Dateand End Date, as well as the Zoom Level.
You can also focus on a specific Department and/or a specific Person.
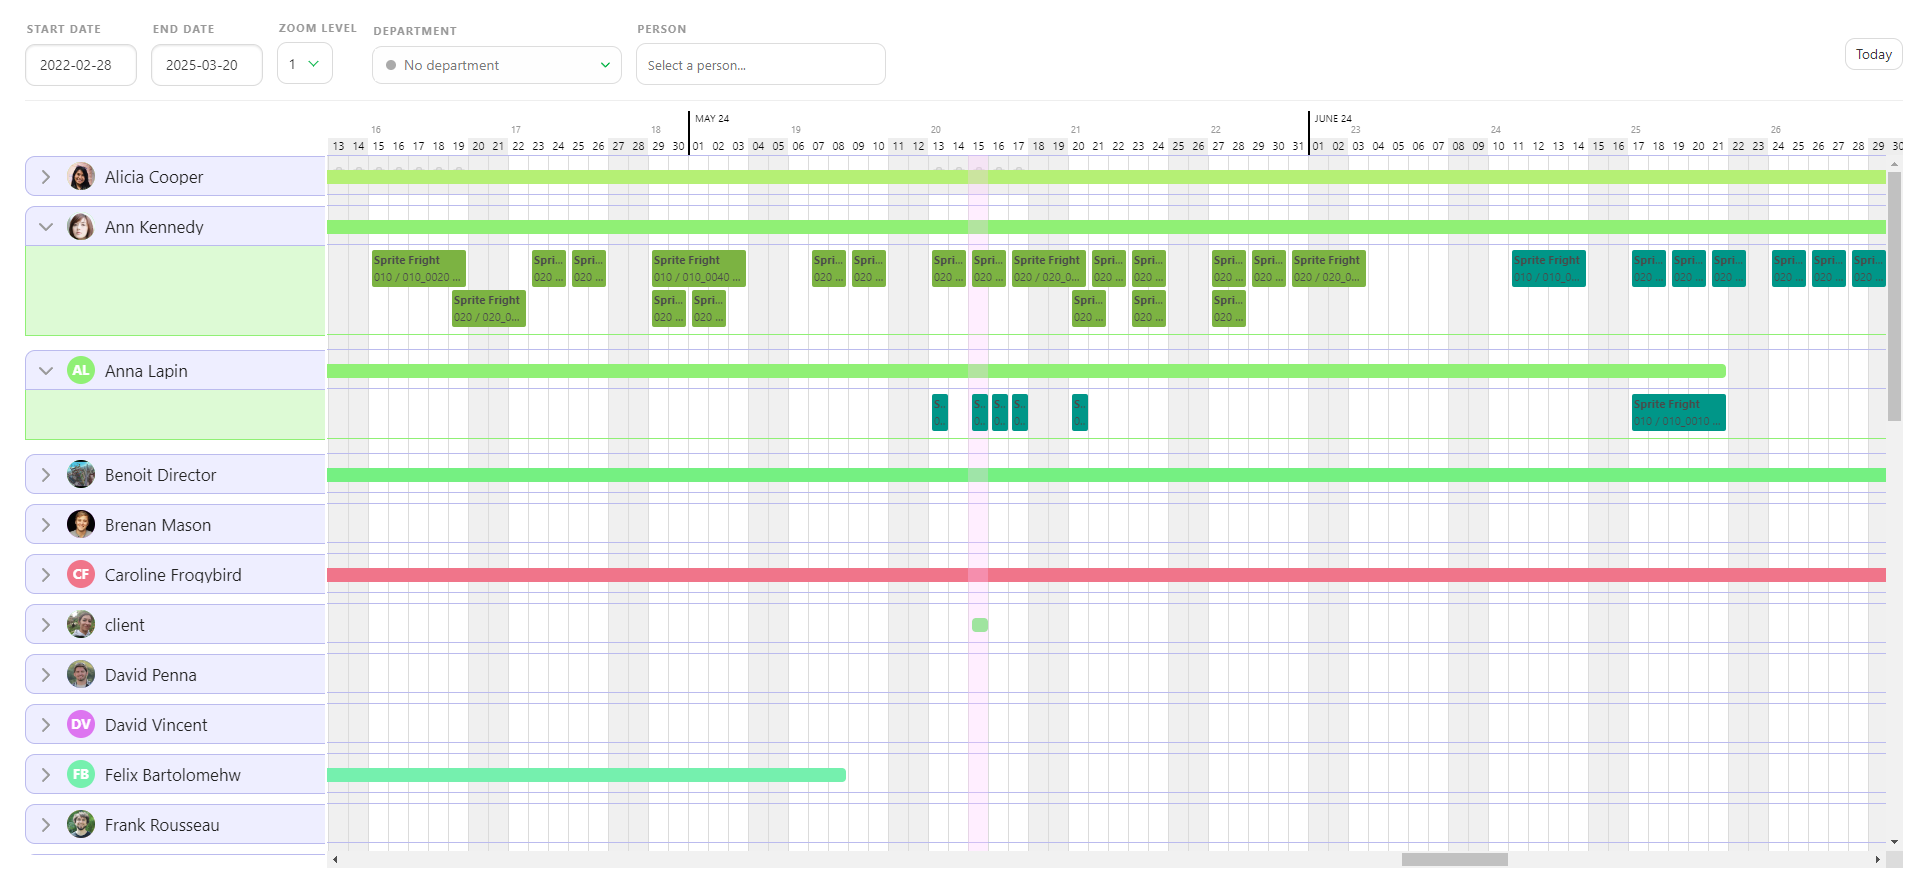
If an artist has several tasks to complete simultaneously, they will be stacked on top of each other.
You can select and move each task around. Thesetasks are linked to the task type schedule